Braids are all the rage and Miami based Master Stylist Raphael Reboh, owner of Femme Coiffure Salon, is providing us with the simple steps necessary to add a spin to your everyday hair styling with a plethora of plaits. Reboh has styled a-list tresses including Jennifer Aniston, Jennifer Lopez, Cameron Diaz, Joan Collins, Adriana Lima, Bianca Jagger and even the late Joan Rivers.
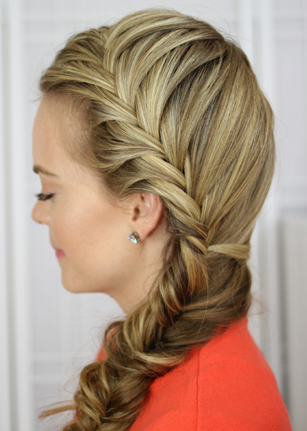
Fishtail French Braid –
This look is also called the new Dutch Braid and it’s a fresh departure from the traditional French Braid. This style is easy to do and great on both thick and thin hair. Naturally, you just need length to for this style.
1. Start by taking a section of the hair near the part on the heavy side
2. Divide that into two halves
3. Now take a small piece from the edge of the right side, cross it over the top and add it to the left side.
4. Do the same from the left side, crossing it over the top and addition it to the right side.
5. Now repeat step three but after crossing the strand over the top, add in a section of hair from that side of the head.
6. Repeat these steps until you reach the top of the ear then begin pulling in hair from the opposite side of the head, stretching it around the back, and adding it into the braid.
7. When all the hair is pulled in, finish with a basic fishtail braid and gently loosen the braid by pulling out the edges. 8. Tie off the end with a clear plastic band and add a pretty hair clip to finish it off.
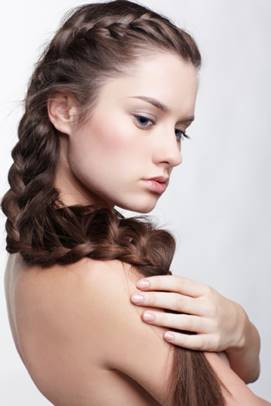
Side French Braid –
1. Part slightly damp hair on the right side. Optional: add a little mousse or gel to keep hair intact and to prevent fly-aways. Next, take about a two-inch chunk of hair from the front of the right hairline, and begin a French braid
2. To start a French braid, section this portion of hair into three even strands, keeping them separated with your fingers (whichever ones feel most comfortable to you). Now, start a normal braid; take the right strand and cross it over the middle strand. Next, take the left strand and cross it over the middle strand.
3. Once you have this small foundation braid, begin adding more hair with each crossover. To do this, gather a small bit of hair from the hairline, add it to the rightmost strand, and then cross it over the middle strand. Pull it tight, but keep the strands separated at all times. Repeat on the other side by gathering a small bit of hair closest to the side part (away from the hairline), adding it to the leftmost strand, and then crossing it over the middle strand.
4. Continue this braiding pattern until you are about one inch away from the right neckline. At this point, start to braid horizontally across to the left neckline. Tip: keeping the braid tight and separating the three sections of hair at all times will help you control the direction of the braid.
5. Try to gather all the hair into the French braid by the time you hit the bottom of the left ear. Once all the hair is incorporated, finish braiding traditionally. Secure with an elastic band.
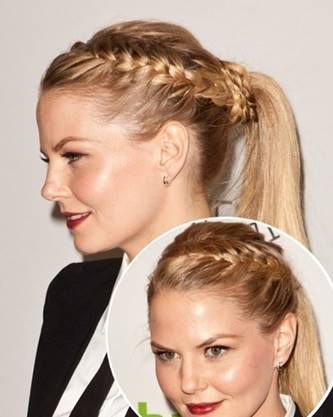
Half French Braid Wrapped Ponytail –
1. Begin by parting the hair off center on the right. Part further back on the top of the head.
2. Part it down to the ear and secure all the rest of the hair hanging down in the back for now.
3. At the top on the left side of your part, start plaiting a braid.
4. Once you’ve plaited one round of the braid, grab some hair from the top & add it in, like you’re French braiding.
5. Only add hair in from the top as you’re plaiting the braid.
6. Once you run out of hair to add & have reached that back part …
7. Stop adding hair but continue doing a regular braid down to the end of the hair. Secure temporarily with a clip.
8. Flip that braid up out of the way and smooth all remaining hair around to the left side of the head.
9. Make a low side ponytail and flip your braid back down.
10. Wrap the braid under your ponytail and bring it back around the top. *If you wrap it over the top it tends to make your French braided part pucker so I have more luck putting it under the ponytail.*
11. Loop the end of your braid back around and under itself so it’s close to the head. I’ve done it the other way too, but this is the way I did it when I documented it all!
12. Wrap it as much as want, but I just do 1 full wrap at the base of the ponytail. Secure the braid to the ponytail with a clear rubber band.
13. Cinch the rubber band up and it’ll disappear under the braid.
14. Unbraid any leftover braid that is hanging down into the ponytail below that clear rubber band.
Headband Braids –
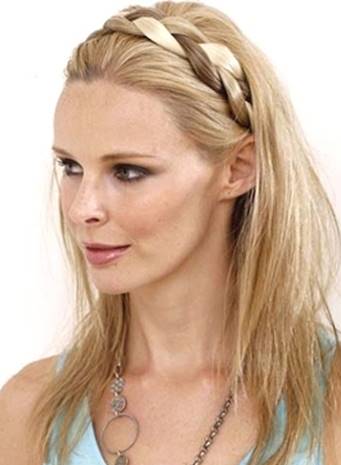
Headbands and braids are two hair trends that never go out of style. This boho chic hairstyle is great because it will keep hair out of your face and doesn’t give you that horrible headband headache. Begin by making two parts, one of each side of the head near the ear. Comb the remaining hair backwards into a ponytail. Then take the right side of the hair and braid, lifting it around the head. Wrap a hair elastic at the bottom of the right braid and repeat on the left. Lift both braids and wrap them around your head, positioning them toward the front. Secure both braids along the bottom of the head with a bobby pin. Release the hair in the back. This look is versatile enough to go from everyday errands to a glam night out.
Loose Headband Braid –
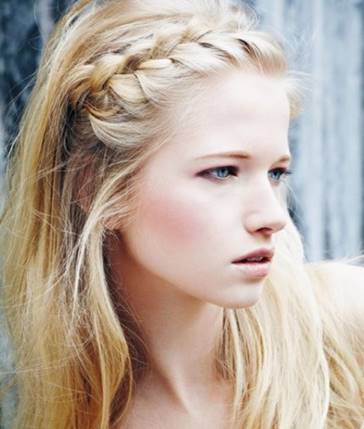
Braided headbands continue to be one of the most stylish ways to hide the effects of humidity, frizz and winter hat head all year long.
Start by taking a 2-inch wide section of hair from right behind of your right ear. Tie the rest of your hair back with a hair tie in order to keep it out of the way – we’ll come back to this part later!
Comb the 2-inch section of hair towards the left ear, over the top of your head so that it’s primed to go in the direction you will be braiding. If needed, use a blow dryer or hair spray to help pull hair in the right direction.
Divide the 2-iinch section into 3 pieces and begin braiding a simple braid, going over your head to form a headband. Aim for the headband to rest between 1 and 1.5 inches back from your hairline. Having it loose or tight is your choice. When you reach the end of your braid, secure the braided section behind the left ear with either just a hair pin or both a hair elastic and hair pin.
For a more polished look, use booby pins to tuck-in loose hair around the braid. For a boho vibe, keep the loose pieces as is. Spray the braided headband with hair spray before untying the non-braided portion of your hair and styling as desired.
About Raphael Reboh, Femme Coiffure
Raphael Reboh, Owner of Femme Coiffure in Miami Beach moved from Paris, France to Montreal Canada with his siblings to open their first salon. All of the brothers had a special knack for hairstyling. About 20 years ago, Reboh saw an opportunity to open a salon in prestigious Bal Harbor, Fl and later Miami beach. Years of talented styling have granted to the hair expert an A-list clientele with stars including Jennifer Aniston and Cameron Diaz. Femme Coiffure boasts a modern interior design approach with a monochromatic white color scheme and hints of baby blue furnishings. Femme Coiffure offers a range of services including cuts, blow-outs, color and special offerings like Brazilian Blowout Smoothing Treatments. For more information about Raphael Reboh and Femme Coiffure, please visit www.femmecoiffure.com

love those braids,,im so going to try these out,,i have very long hair and love to braid it
These braids are so pretty, and there is so many unique ways to style it, I love the braid on the top of the head like a headband. Very pretty.
I have a little niece with long hair and I love to braid her hair whenever I can. I love the look of headband braids but don’t know how to do them. I’m going to try the tutorial and see what happens. The hardest part is trying to get her to sit still.
Beautiful, I love this 😀